Tumblr Black and White Drawing With Range of Grays
sadlumber asked:
I really like that click and drag Mirio, I literally gasped how dare you. Do you have any tutorials on how to do those click and drag images? I too, as well, also would like to punch people metaphorically in the gut
:'D Thanks! Here's my process on how I do it , so you can join the dark side.
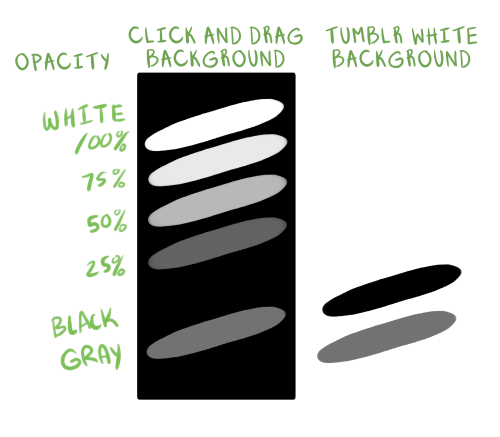
So here's the basics. What you'll need to remember when working with transparencies are the range of opacity and shades of gray.
Black is the base that will show up on the white tumblr background and so will be what you want viewers to see FIRST. The opacity can be changed to add various shades of "gray" that's only visible before clicked/dragged.
Gray is visible in both clicked and default Tumblr background, so any elements in your drawing that needs to be visible in both can be colored any shade of gray (how light/how dark is up to you on how visible you want it to be on one side or the another).
White is only seen when the image is clicked/dragged. The opacity of the white can be changed to add various shades of "gray" that won't be visible on the white Tumblr background.
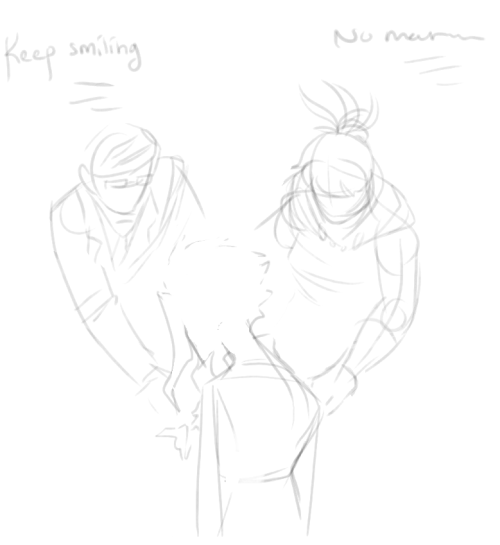
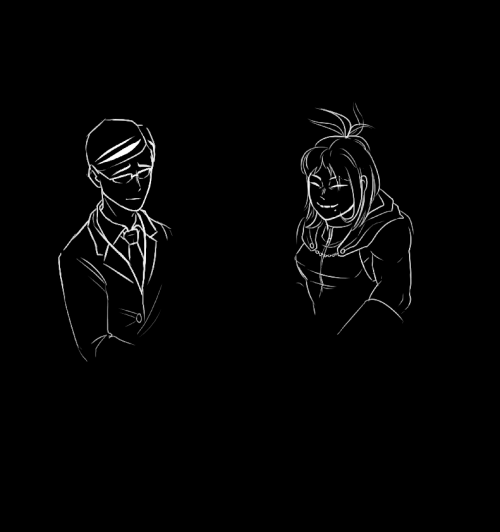
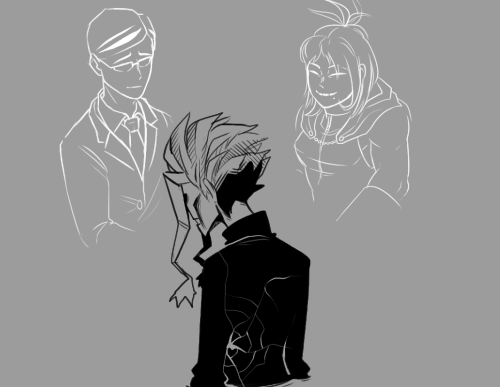
So here's a quick sketch of what I'm planning to do the effects on… (keep reading below)
Keep in mind where you want to put the negative space into use (search up what's negative space, there are tons of cool examples and effects you can learn about it).
I usually start off with drawing out in black the parts that need to be visible at first.
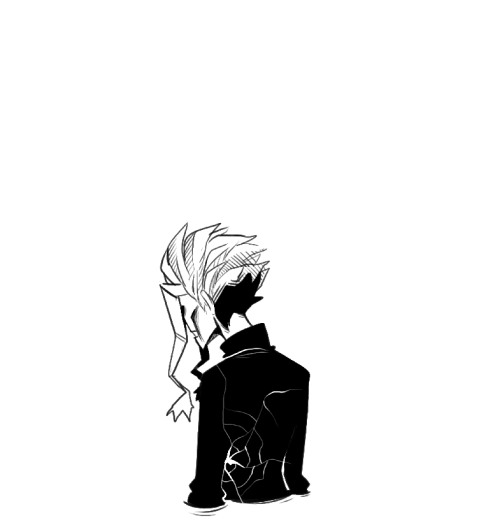
Have one completely white layer (serve as the Tumblr white background) and one completely black layer (the drag/click background).
When outlining things… REMEMBER THE BLACK WILL DISAPPEAR.
Erase parts that you want to show up as white BUT ALSO DISAPPEAR TOO.
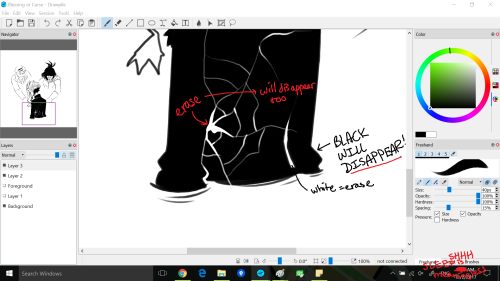
Switch the background to the black background layer to draw out the white parts that will be only visible after clicked/dragged.
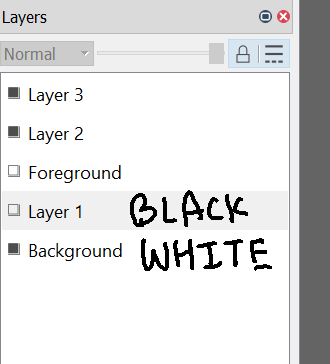
Using the range of opacity that you can work with to make shades of gray with white color alone…
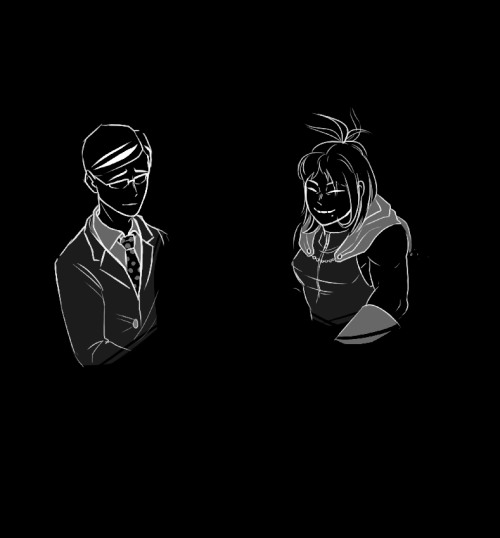
Each shade of gray is to be on a separate layer based on how light you want the shade of gray to be.
Ta-da! You can't see them when you make the black background layer invisible!
A tip: You can adjust the opacity of the black layer just to see how the image aligns/is going,etc. or just wanna see how cool it is so far.
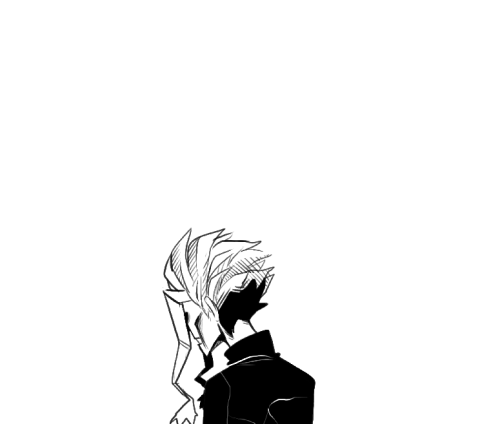
Okay, here's the magic. Make the 3D glitch effect. (it's just… the lines recolored red and blue and moved so that they don't align with the black lines anymore.) THIS STEP IS OPTIONAL! However, I use it as a way to bring out the otherwise invisible black parts. You may come up with a different method or outline the black parts with white.
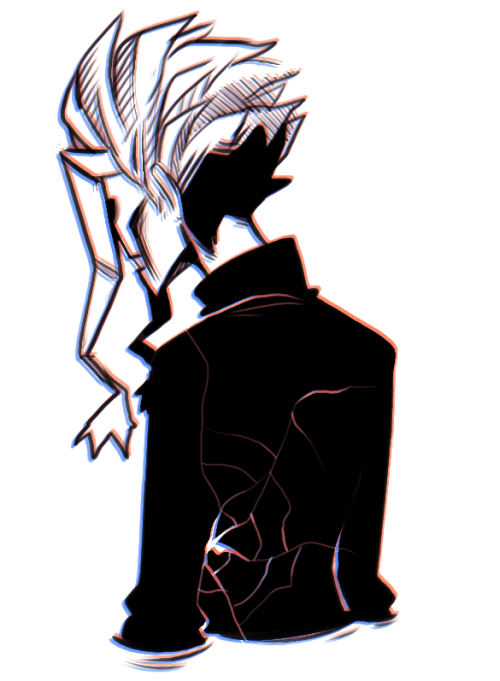
Anyways, remember the opacity change for the black layer? It's really useful if you want to add in some white areas for the black outlined subjects.
And… boom.

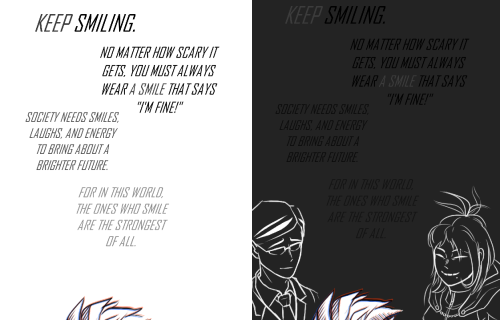
Okay. Here we go… words. Ignore my half-azzed arrangement. But here's what I did with the words. White = invisible until clicked. Black = disappear when clicked. Gray = visible in both conditions.
**Change the opacity of the black to get a faded effect on the words.
Use the words to your advantage. Pick out a hidden phrase, etc. to become visible only when clicked. You can get the from the original phrase put in… or write in white to write out a hidden message.
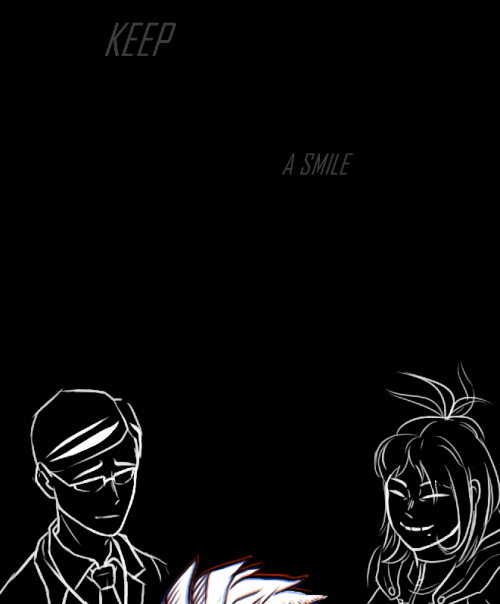
And done.

Go wreck some hearts will ya? Plus, lemme know if you plan on trying it! >u> Would love to see what y'all can come up with from my tutorial that I should never have done so late at night…
-
 dandelionsandboys liked this
 -
 littlelostshadow liked this
 -
 randomsove-art liked this
 -
irandomfuckery liked this
-
 yugandhara-marathe liked this
 - Show more notesLoading...
Tumblr Black and White Drawing With Range of Grays
Source: https://hexagonsgalore.tumblr.com/post/168642589628/i-really-like-that-click-and-drag-mirio-i